


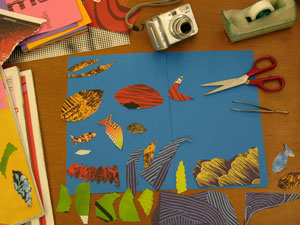
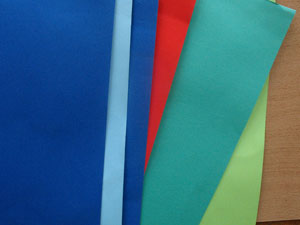
- Color paper. You can also cut up newspapers and magazines, avoid glossy paper.
- Scissors
- Adhesive tape
- Digital photo camera
- Tripod
- Computer with installed video editing software
- Lighting fixtures – table or floor lamp (optional)


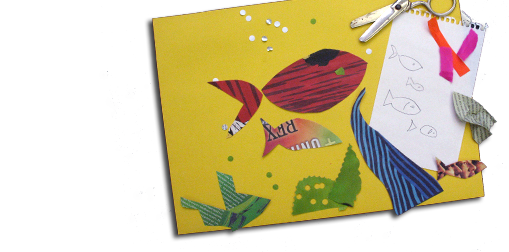
- To produce a moving image film with color papers, you will have to cut and tear paper to create your characters and their background environment. Both can be as real or as imaginary as you want.
- To create the environment, pick a colored paper for the background. Stick down all the color paper pieces which are not supposed to move. Then, position all the paper pieces that you plan to move later in your film.
 It helps if the background paper is in proportion with the dimensions of the photographs of your camera. (It is really frustrating to later realize that your image has the wrong proportions!). To do this, simply place your camera facing your paper and look at the screen. Crop your paper to fit the camera screen.
 - Make simple character figures with color paper. Start with 1 or 2 simple figures. Later, when you are more experienced with the technique, you can experiment with more complex figures.
- Place your figures on the background environment. Try moving your figures around in different ways before deciding on the final sequence. Start with something simple. As soon as you have decided on what you want to do, you can start taking photographs

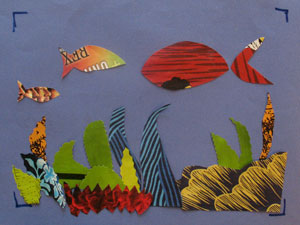


- Tape the background environment on to the table. Place your figures on the background, as you want them to be in the beginning of the film.
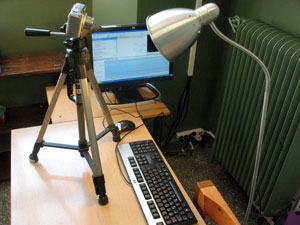
- Mount you camera on the tripod. Adjust the tripod facing downwards towards your background paper. Look into the camera screen. Make sure you can see the entire composition as straight as possible in the screen.
If the entire drawing is not in the screen you might have to adjust the tripod so that the camera is higher up. If the table surface shows around the background, move your camera closer.
 Try using the camera zoom to approach or move away from your background environment.
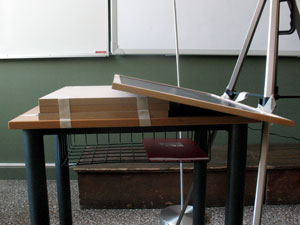
If you can’t avoid seeing the tripod legs in the camera screen, try tilting the surface on which you place your background and then tilt your camera by adjusting the tripod. - Spend some time on the lighting. Make sure that no surrounding objects, the tripod or even you cast shadows on your composition. If you want, you might try lighting the set with a portable lamp on one side (or even better, one lamp on either side). The lamps should cast a smooth flat light on your background.
 Make sure your lighting is constant. All photographs should have the same lighting to make sure that some are not brighter than others.
 - When everything is ready and set up, it’s time to start photographing!
You’ve already read Before Starting, so you know that while photographing your drawings, the camera and the tripod have to be absolutely stable. Watch out! It’s easy to kick the table and tripod by accident.
Take the first picture of the sequence with everything arranged just as you’ve set it up. Then, slightly move the figures that you want to animate and take the next photograph. Move the same figures again and take another photograph. Keep doing this until all your figures have done what you want them to do. It is very important to make small moves between taking each picture. Experience will help you get a better feeling for how much to move you figure each time.
 It is much easier and fun to work with friends! If there are two of you, one can take the photographs and the other can move the character figures. If you are three, one can take the photos while the other two each move a figure.
When you have finished photographing your entire sequence, remove the camera from the tripod. Transfer your photos into a folder in your computer.
 It is a good idea to name your project folder with a name which reminds you of the activity you have just photographed e.g. swimming fish.
 Your characters and figures appear to move when you view the photos you took very quickly one after the other.
For this you will need to use video editing software. Many computers have this software already installed and, if not include a program that can be downloaded from the internet. Read about how to edit your film in the Before Starting chapter.

On the left are examples of drawn animation projects created by primary school children in workshops led by Christina dePian.
Bellow, are links to examples of short animation videos on the internet created by children, students and/or amateurs. Further down, are examples of work by professionals and some classics of drawn animation.
Have a look and use these videos as a sourse of inspiration and ideas.
Contact us when you have created your own animation projects.
We are looking forward to seeing them!
Videos created by children, students and adults:
- Recycling - 6th grage students/ Ermoupolis, Greece
- When you switch off the light - 6th grage students/ Ermoupolis, Greece
- The twelve tasks of Hercules
- Paper city colors
- A visit to the kitchen
- Paper cut out elephant
- Faerie
- The unfriendly cloud
- Fire safety
- Nick Park early animation
- British Airways
Videos created by professionals:
- When love is real
- The magic horse - Lotte Reiniger (1953)
